WEDGE ANCHORS & WEDGE BOLTS

Wedge-All - Wedge Anchors

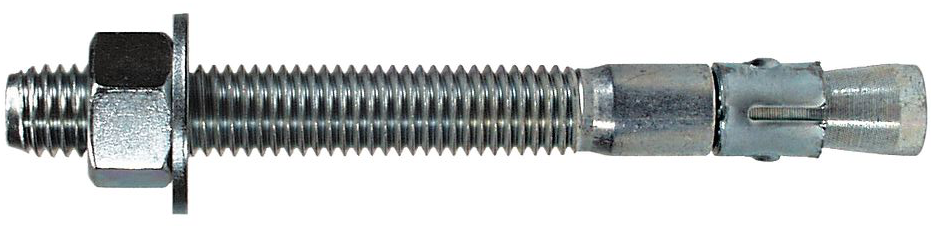
The Wedge-All wedge-style expansion anchor is intended for use in solid concrete or grout-filled masonry. This anchor is best suited in installations where a building code approval for seismic and cracked/uncracked concrete is not required. Threaded studs are set by tightening the nut to the specified torque.

Key Features

  • One-piece, wrap-around clip ensures uniform holding capacity
  • Threaded end is chamfered for ease of starting nut
  • Available in a wide range of diameters and lengths

Finish

  • Carbon steel anchors are available zinc plated or mechanically galvanized

Installation

  1. Drill a hole in base material using a carbide drill bit the same diameter as the nominal diameter of the anchor to be installed. Drill the hole to the specified embedment depth, and blow it clean using compressed air. (Overhead installations need not be blown clean.) Alternatively, drill the hole deep enough to accommodate the embedment depth and the dust from drilling.
  2. Assemble the anchor with nut and washer so the top of the nut is flush with the top of the anchor. Place the anchor in the fixture, and drive it into the hole until the washer and nut are tight against the fixture.
  3. Tighten to the required installation torque.

 Caution

  • Do not use an impact wrench to set or tighten anchors
  • Oversized holes in the base material will make it difficult to set the anchor and will reduce the anchor’s load capacit

Strong Bolt 2 - Wedge Anchors

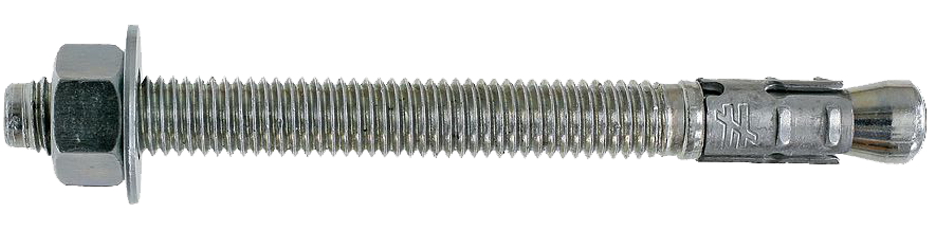
Code listed for cracked and uncracked concrete, and masonry applications, the Strong-Bolt 2 wedge-type expansion anchor is an optimal choice for high-performance even in seismic and high-wind conditions. Dual undercutting embossments on each clip segment enable secondary expansion should a crack form and intersect the anchor location; this feature significantly increases the ability of Strong-Bolt 2 to carry load if the hole expands.

Key Features

  • Chamfered top designed to prevent mushrooming during installation
  • Qualified for static and seismic loading conditions (seismic design categories A through F)
  • Suitable for horizontal, vertical and overhead applications
  • Qualified for minimum concrete thickness of 3 1/4″, and lightweight concrete-over-steel deck thickness of 2 1/2″ and 3 1/4″
  • Standard (ANSI) fractional sizes: fits standard fixtures and installs with common drill bit and tool sizes
  • Tested per ACI355.2 and AC193

Installation

  1. Drill a hole in the base material using a carbide drill bit the same diameter as the nominal diameter of the anchor to be installed. Drill the hole to the specified minimum hole depth, and blow it clean using compressed air. (Overhead installations need not be blown clean.) Alternatively, drill the hole deep enough to accommodate embedment depth and dust from drilling.
  2. Assemble the anchor with nut and washer so the top of the nut is flush with the top of the anchor. Place the anchor in the fixture, and drive it into the hole until the washer and nut are tight against the fixture.
  3. Tighten to the required installation torque.

Titen HD - Wedge Bolts

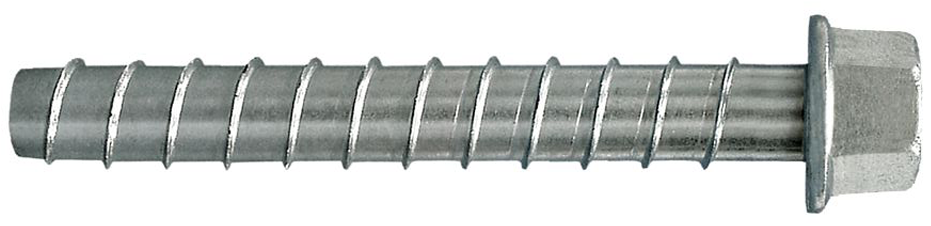
A high-strength screw anchor for use in cracked and uncracked concrete, as well as uncracked masonry. The Titen HD offers low installation torque and outstanding performance. The Titen HD screw anchor is designed for a wide variety of applications such as sill plates, ledgers, post bases, seating, and other holdown applications. The screw anchor is easy to remove when used in temporary applications such as bracing and formwork, or when a fixture needs to be relocated.

The stainless-steel Titen HD is the optimal choice for applications in corrosive or extreme environments such as salt water, or when chemical or corrosive solutions are present. See Stainless-Steel Titen HD for more information.

Key Features

  • Tested in accordance with ACI 355.2, AC193 and AC106
  • Qualified for static, wind and seismic loading conditions
  • Thread design undercuts to efficiently transfer the load to the base material
  • Standard fractional sizes
  • Specialized heat-treating process creates tip hardness for better cutting without compromising the ductility
  • No special drill bit required — designed to install using standard-sized ANSI tolerance drill bits
  • Hex-washer head requires no separate washer, unless required by code, and provides a clean installed appearance
  • Removable — ideal for temporary anchoring (e.g., formwork, bracing) or applications where fixtures may need to be moved
  • Use in dry interior environments only

Finish

  • Zinc plated 
  • Not recommended for permanent exterior use or highly corrosive environments

Installation

  1. Drill a hole in the base material using a carbide drill bit the same diameter as the nominal diameter of the anchor to be installed. Drill the hole to the specified embedment depth plus minimum hole depth overdrill (see table below) to allow the thread tapping dust to settle, and blow it clean using compressed air. (Overhead installations need not be blown clean.) Alternatively, drill the hole deep enough to accommodate embedment depth and the dust from drilling and tapping.
  2. Insert the anchor through the fixture and into the hole.
  3. Tighten the anchor into the base material until the hex-washer head contacts the fixture.